Top 6 water-treatment tips for lasting chiller performance

Chillers are the backbone of commercial and industrial cooling systems across the country. However, they are not a ‘fit-and-forget’ solution, Brent Hall of ICS Cool Energy highlights some easy ways to look after a chiller to ensure it lasts 10 years and more and performs as efficiently as possible.
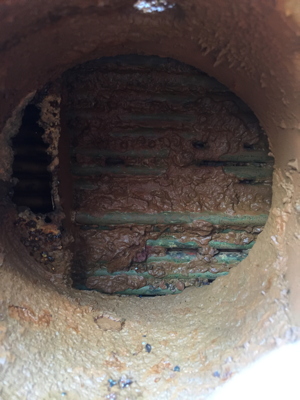
Water treatment is a fundamental part of a chiller’s operation and maintenance. Most maintenance engineers know that if a chiller’s water and glycol mix is incorrect, the effects can be rapid and disastrous — leading to corrosion, system deterioration, and leaks, as well as the build-up of rust, scale, algae and debris. However, having a simple ‘watch list’ will help to avoid a crisis.
1. Don’t forget inhibitors
Glycol is an essential element of any heat-transfer fluid used as part of a chilled water system, as it allows the fluid to be sufficiently chilled without freezing. However, an uninhibited glycol system can pose even more of a risk than plain water due to the highly corrosive nature of most glycols, so inhibitors must be used at all times.
For those operating in areas where there is a risk of incidental human contact, such as the food-processing industry, the wrong inhibitors in an MPG solution creates a serious contamination risk, but an NSF-accredited glycol overcomes that.
2. Take regular water samples from various parts of the system.
Corrosion and degradation can happen anywhere within a system, and it’s not enough to take water samples from just one location. Samples need to be taken from available access points around the system — especially from high-risk areas such as heat exchangers, cooling jackets and any other sensitive product-fluid interfaces.
3. Test fluid pH levels
Not taking pH readings as part of routine water sampling can have a major negative impact on a system’s performance. While chiller pH tolerances will vary slightly depending on the materials used, I would recommend limits of 8.0 to 8.5. Incorrect pH levels may indicate that either not enough inhibitors have been used or the glycol levels are too concentrated. Both scenarios can very quickly cause high levels of corrosion throughout a system if left unchecked, leading to costly maintenance bills and unplanned downtime.

4. Check the clarity of the sample
Not all tests are as in-depth as pH level, and one of the most obvious signs that a chiller system is degrading or corroding internally is when there’s visible debris in the water sample. A water sample from a chiller operating correctly should be clear; if it’s not, then there’s already some internal system damage. This needs to be addressed immediately as the debris can soon lead to blockages in key areas of operation such as the heat exchanger, which will rapidly decrease the chiller’s efficiency.
5. Chemically flush your system and chiller immediately after installation
As soon as a new chiller is installed, the whole system should be flushed immediately to ensure the fluid is completely free from contaminants and at the highest quality possible, with no legacy debris or surface contamination present to cause damage to the fluid, the pipework and the new equipment. This golden rule should be followed, whether it’s a permanent or temporary installation for planned or reactive maintenance.
6. When in doubt, consult the experts
Given the intricacies of taking a thorough and correct sample from a chilled-water system, it sometimes pays to call in an expert. Regular water sampling and off-site laboratory analysis is available as part of some chiller manufacturers’ after-sales and servicing packages — including planned preventative maintenance packages (PPM) from ICS Cool Energy.
Brent Hall is technical manager with ICS Cool Energy.


